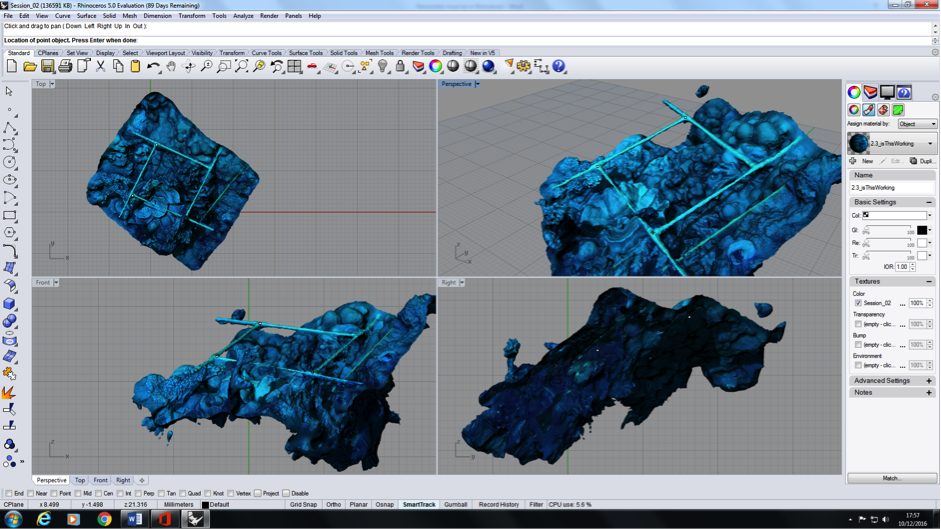
I've been teaching students how to manipulate 3D models in Rhino so that they can research using 3D models of coral reefs. After a 3D model is imported into Rhino, the first step in analysis is to orient and scale the model in 3D space. This task, although simple in theory, can be tricky for Rhino-novices and is what I teach as soon as students open Rhino. It can be frustraiting at first, but within a half-hour or so students usually get it and it becomes like second nature. Here's the method written out.
FIND SCALE OBJECT
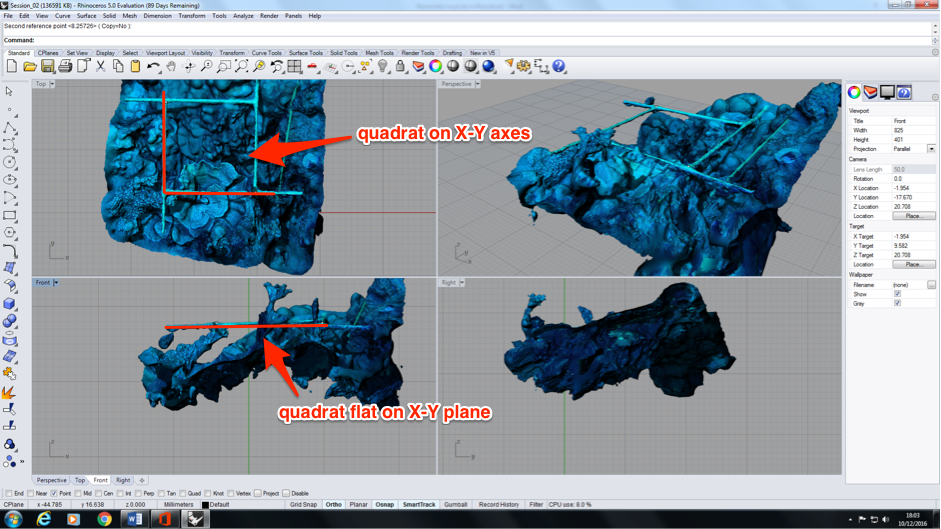
We place a known object in all our 3D models to use for scale and orientation. In most of our reef studies, that object is a 1 x 1 m PVC square (called a "quadrat"). In order to be consistent across all our models, we always place one corner of a quadrat at the origin (x = y = z = 0) and align the adjacent quadrat edges along the X and Y-axes, so that the quadrat rests in the first quadrant. Make sure you can see the quadrat in your 3D model. View > Zoom > Zoom Extents All may be useful, as will zoom, pan, and spin operations. You can move around your 3D model by holding down the right-click button while you're in a viewport.
ON WINDOWS:
(1) Place the Object Snap toolbar at the bottom of your screen to make your life easier. To do this, go to the Tools menu at the top of the screen, Object Snap > Persistent Osnap Dialog. You should see the menu appear as a strip under the viewports.
(2) Type Points in the command prompt at the top of the screen.
(3) Click Tools > Object Snap > Persistent on Mesh. Choose the reef mesh when it asks (the prompt will be at the top of the screen near the command line). Then, place a point at each of three corners on the quadrat in the 3D model. It will probably be easiest to do this from the perspective viewport. When you are finished placing points, hit Enter.
(4) Hit Control+A to select everything, i.e., both your reef mesh and the three points you just created. Type Group and then Enter at the command line. This is just like the group feature in PowerPoint.
(5) Type Move at the command line and then Enter. It'll ask you to select the object to move. Click the reef mesh and then hit Enter. Now it'll ask for the point to move from. Of your three points, choose the point that's between the other two. To make sure you choose your point and not some random place in 3D space, tick the box next to "Point" on the OSnap toolbar (see step (1)). [Note: It'll be hard to see where your three points are now that the model is selected, so you've to run your mouse around the model to find them, or remember roughly where they are. If you really can't find them hit "Esc," and then SelPt to see your points and start Rotate again.] Hit Enter and then it'll ask you to select the point to move to. You want to move this point to the origin. To make it easy to select the origin, in the lower toolbar make sure "Grid Snap" is selected and all other features are de-selected there. Zoom and Ortho modes will be useful.
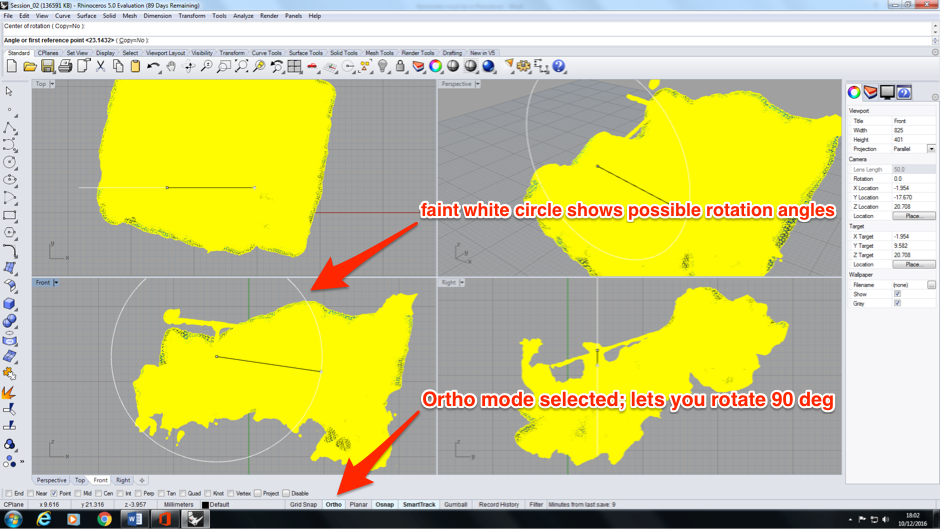
(6) Now you want to rotate your model so that the three points all lie on the X-Y plane. To do this, type Rotate then hit Enter at the command line. It will instruct you to select the object to rotate. Click on the reef mesh and then hit Enter. It'll then ask you to select the center of rotation. Click the center ploint you placed at the origin; make sure the box next to "Point" on the OSnap toolbar is still ticked to help you find this point. It'll next ask for the "Angle or first reference point." Let's start by working in the Top viewport. Select one of the other points in the Top viewport. You should see a faint white circle in the Top viewport showing the possible places of rotation. After you've hit Enter, it'll ask for the second reference point and as you move your mouse around you'll see it rotates the model. Here, you want to make sure Ortho mode is selected in the lower toolbar; this'll restrict your movement to 90degs. Rotate your model so that the point rests on the X-axis.
(7) Use the Rotate command again, this time working in the Front and Right viewports to align the points onto the X-Y plane.
(8) Now your quadrat should be flat on the X-Y plane!
ON MAC:
Questions/comments/something still not working? Comment below and we'll work it out.


