"I'm trying to import an OBJ (with MTL) file into Rhino, but it's just showing up grey. How do I get the correct textures/colours to show?" Ideally I'd have answered on this forum where someone asked same question, but I couldn't make an account there without paying, so here we go.
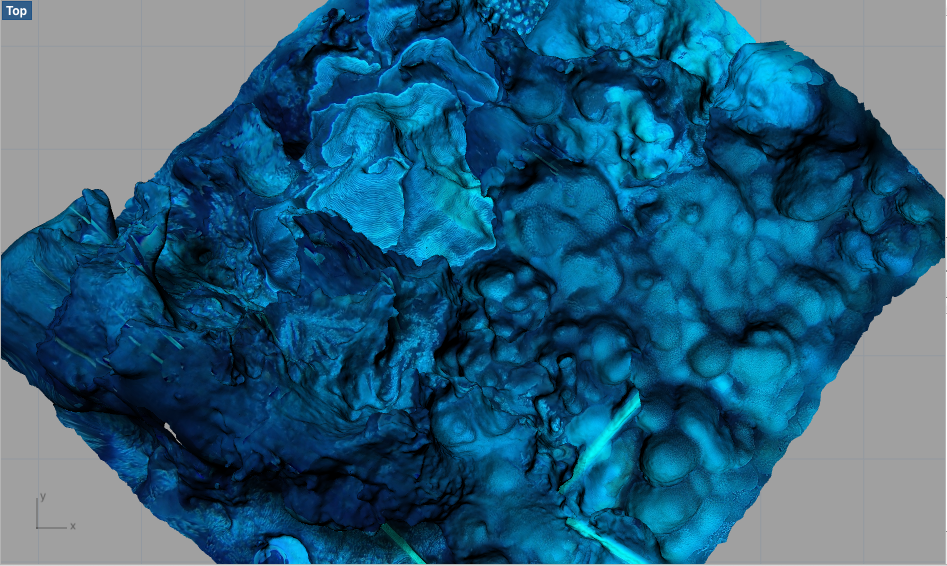 What you want... (colors!) | 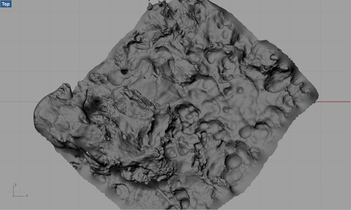 What you have... |
In PhotoScan, when you export your 3D model as a wavefront (.OBJ) file, it creates not only an .OBJ file, but also associated .mtl and .jpeg files. SAVE THESE FILES WITH THE .OBJ. They encode the model's color mapping. Sometimes Rhino isn't smart enough to associate these files with your imported .OBJ, however, so you need to help it.
On RHINO FOR MAC
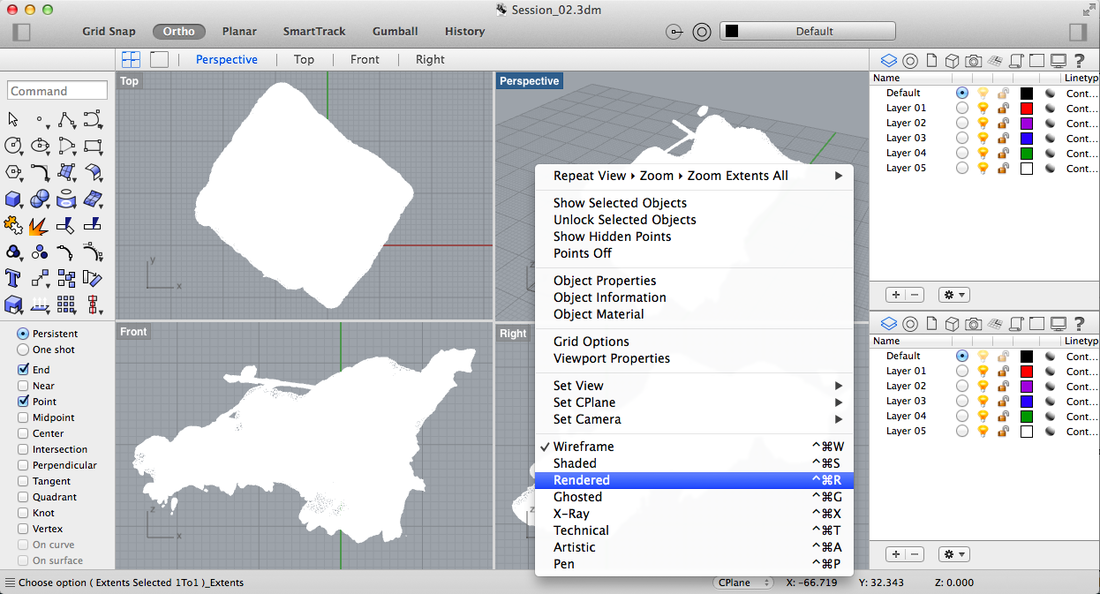
(1) To see a model's color (or "texture") in Rhino, you'll need to be viewing in "rendered" mode. To change a viewport to rendered mode, right click in the view panel and select "Rendered" or use the shortcut ^⌘R.

(2) If the color file is correctly linked with your 3D model, you'll now see color in that viewport! If it's showing grey, however, you'll need to proceed to step (3).
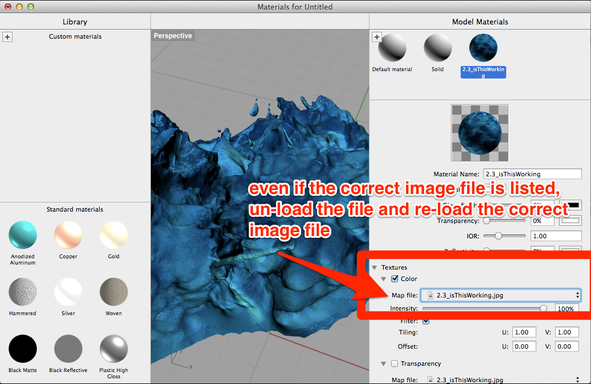
(3) If your rendered 3D model is still grey: Right-click the object, select "Object Properties," then under "Material" click "edit." Under the "Textures" menu, make sure "colour" is checked. For the "Map file," un-load the file already there (if there is one; and even if it's the correct one) by selecting the option "Choose..." Then, re-load the correct image file. This should add the correct colours to your object.
RHINO FOR WINDOWS
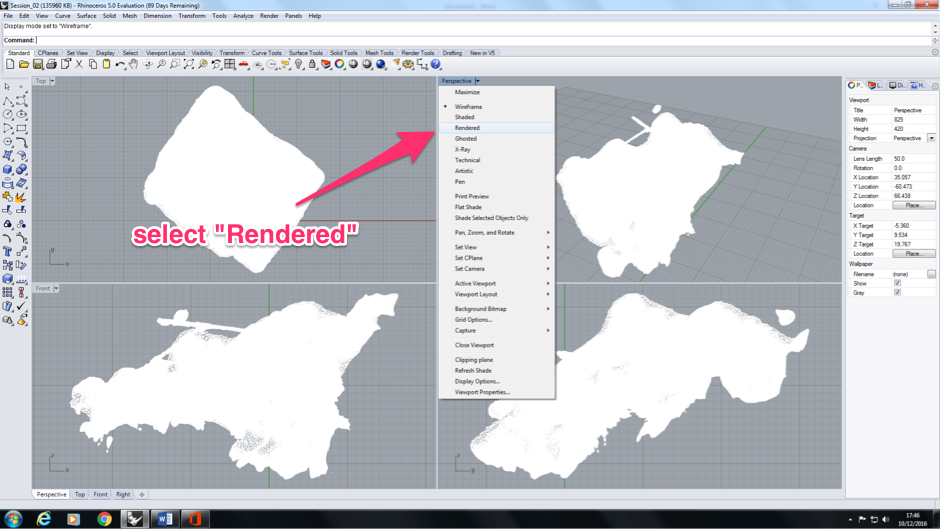
(1) To see a model's color (or "texture") in Rhino, you'll need to be viewing in "rendered" mode. To change a viewport to rendered mode, click the little arrow by viewport name in the upper-left corner of the viewport and select "Rendered." You need to do this for each viewport you want to see color.
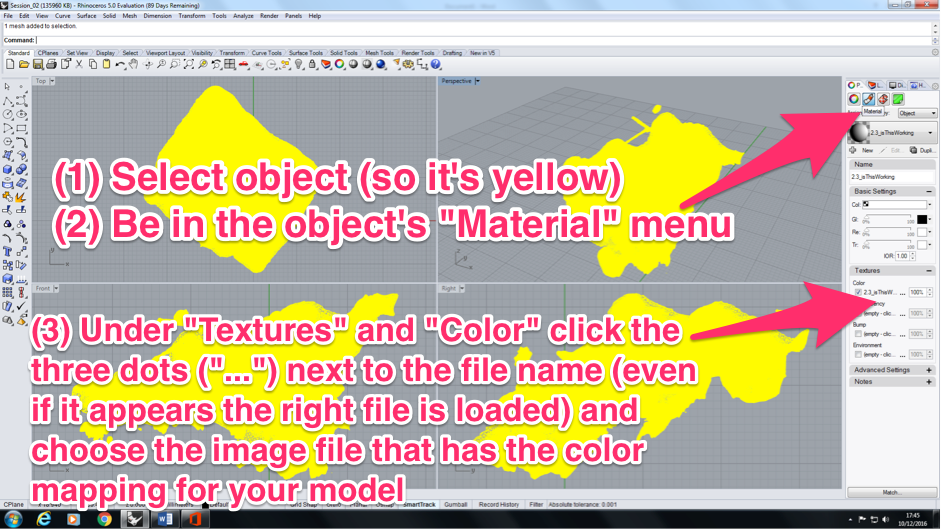
(2) Here it gets involved: (2.1) Select your model. (2.2) In the right-side menu, on the "Properties" tab, click the square with alt-text "Material." (2.3) In this menu, go down to "Texture" and then "Color." Here you can click the three dots next to the file (this isn't clearly a button; just click on the dots) and choose the image file associated with your model.
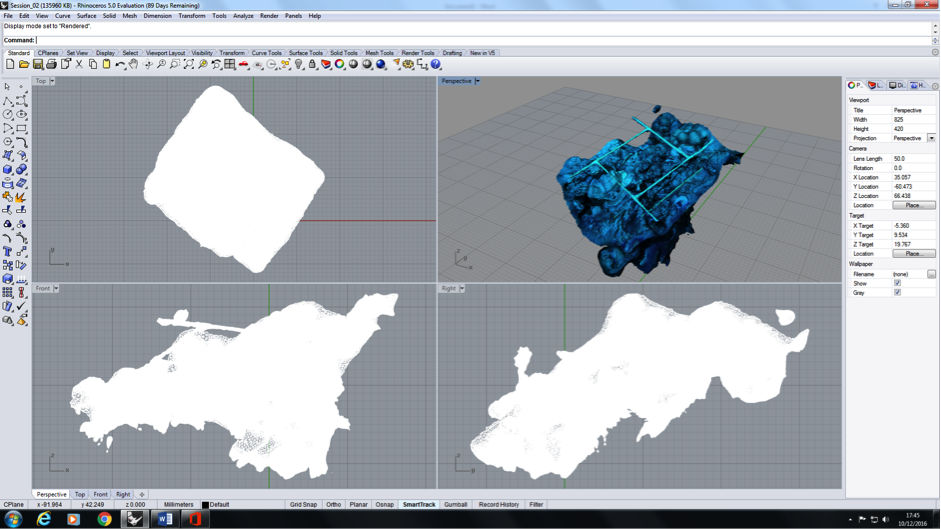
(3) Now you should see the colors mapped onto your model in the viewports that are in "Rendered" mode!
Still having issues? Post a comment below and we'll figure it out.
